To repair a rusty dishwasher rack, first remove all loose rust using coarse sandpaper or a wire brush. If a metal tine is completely rotted through, snip it off with bolt cutters. Wipe the sanded area clean with rubbing alcohol to remove grease and rust dust. In a well-ventilated area, brush on a food-safe liquid vinyl repair paint (like ReRack) directly over the bare metal, slightly overlapping the existing coating. For rusted tips, slide a vinyl protective cap over the wet paint. Allow the rack to cure completely for 24 hours before running a wash cycle.
Introduction: Don’t Throw That Rack Away Yet
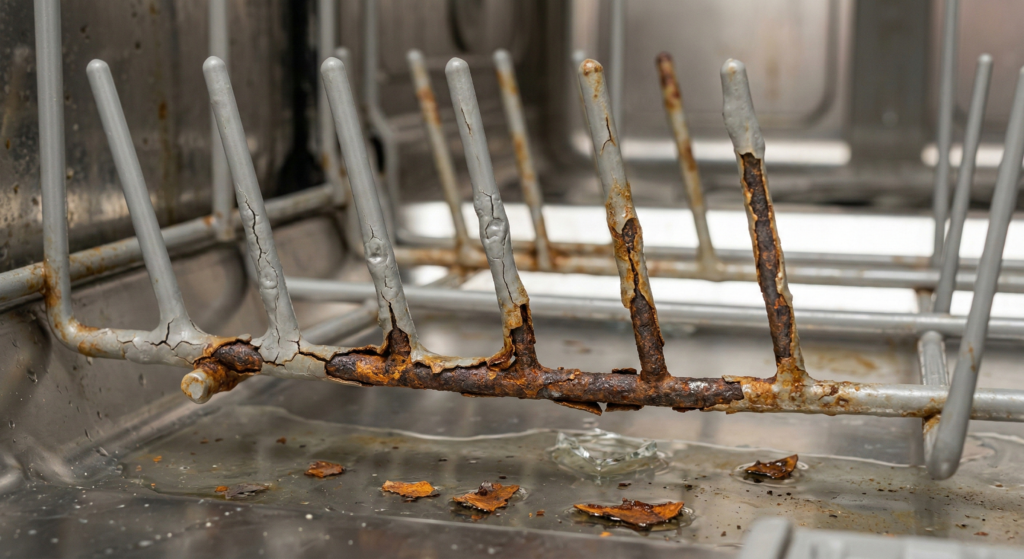
As an appliance technician, one of the most common complaints I hear from homeowners is: “My dishwasher is leaving orange rust stains on my clean plates.” When they go online to buy a replacement rack, the sticker shock hits hard. A new OEM (Original Equipment Manufacturer) rack from brands like Whirlpool, Bosch, or GE can easily cost between $150 and $300. Naturally, people ask if they can just fix it themselves.
The answer is yes. Dishwasher racks are simply thick steel wire frames dipped in a liquid vinyl coating. When you toss sharp knives or heavy pots into the machine carelessly, that vinyl gets nicked. The hot water and oxygen get under the coating, and oxidation (rust) begins. In this guide, I’ll show you how to stop that rust in its tracks and save yourself hundreds of dollars using a $20 repair kit.
Is a Rusty Dishwasher Rack Dangerous?
When people see rust in their dishwasher, their first thought is usually about their health. Let me put your mind at ease, but also give you a severe warning about your appliance.
-
The Health Reality: Rust is simply iron oxide. It is generally harmless to humans in these trace amounts. It won’t give you tetanus just by being washed over your plates. However, it will leave nasty, permanent orange stains on your expensive porcelain and silverware.
-
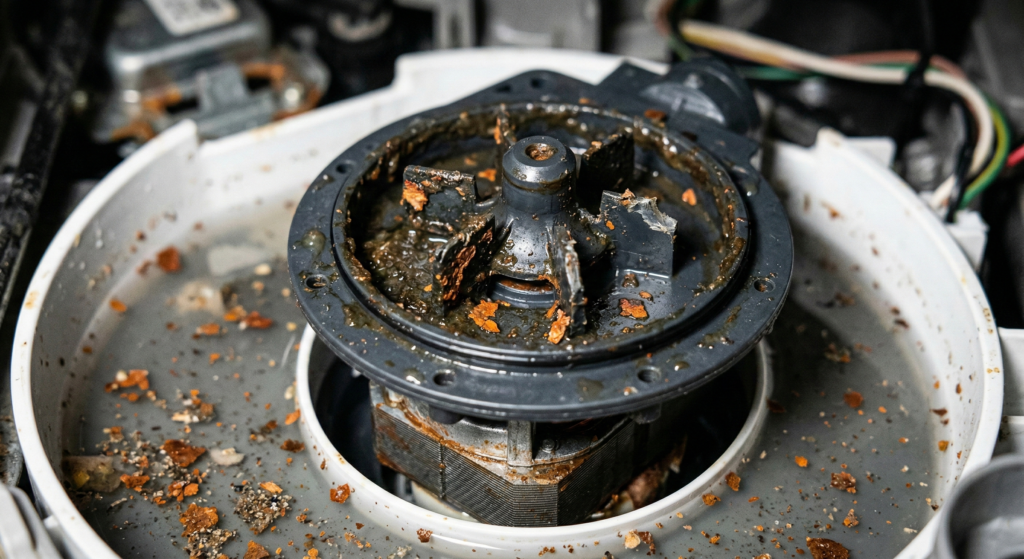
The Machine Reality (The Real Danger): This is what appliance techs worry about. As rust bubbles and flakes off the rack, those hard iron oxide chunks fall to the bottom of the tub. They get sucked straight into your dishwasher’s drain pump. These flakes can easily chew up the magnetic impeller inside the pump or clog your spray arms, turning a $20 rack repair into a $300 motor replacement.
Repair vs. Replace: The “Wiggle Test”
Before you buy supplies, we need to find out if your rack is actually salvageable. I use what I call the “Wiggle Test.”
Grab the rusted tine (the little vertical prongs that hold your plates) and give it a firm wiggle.
-
If it feels solid and only the surface coating is peeling away, it is repairable.
-
If it bends easily at the base or snaps off in your hand, it is rotted through. If you have one or two rotted tines, you can just snip them off entirely with bolt cutters and seal the base. However, if half your rack is snapping off, structural integrity is gone. At that point, you have to bite the bullet and buy a new rack.
Essential Tools & Materials (Don’t Use Standard Paint!)
To do this right, you need specific materials. Do not use standard spray paint or regular super glue. The inside of a dishwasher is a brutal environment filled with scalding hot water, harsh chemical detergents, and steam. Regular paint will turn toxic and peel off after one wash.
Here is your shopping list:
-
Liquid Vinyl Dishwasher Repair Paint: The industry standards are ReRack or Uber Goop. These come in small bottles with a brush applicator (like nail polish) and are usually available in white or light gray.
-
Vinyl Tine Caps: Little rubber “sleeves” that slide over the repaired tips of the rack.
-
Coarse Sandpaper (or a small wire brush): A sanding block or a “micro-zip” sander works perfectly.
-
Rubbing Alcohol (Isopropyl): For degreasing.
-
Paper Towels or Rags.
-
Wire Cutters / Small Bolt Cutters: Only needed if you have dead tines to remove.
Step-by-Step: How to Repair Your Dishwasher Rack
Step 1: Prep and Cut
Pull the rack completely out of the dishwasher and set it on a well-lit table. Using your coarse sandpaper or wire brush, aggressively scrub the rusted areas. You need to remove all the loose, flaky rust and any bubbling vinyl around it. Sand it down as close to the bare, shiny metal as possible. If a tine is too far gone, use your cutters to snip it off at the base.
Step 2: The Deep Clean
This step determines whether your repair lasts a week or a decade. Pour rubbing alcohol onto a paper towel and rigorously wipe down the areas you just sanded. You must remove all the fine “rust dust” and any leftover food grease. Let it air dry completely.
Step 3: Applying the Liquid Vinyl
Warning: This stuff has a very strong chemical smell. Open a window or do this outside.
Using the brush applicator, dab a layer of the liquid vinyl onto the exposed metal. Do not brush it thin like paint; dab it on thick. Make sure to overlap the liquid vinyl onto the healthy, existing coating by about a quarter of an inch to create a watertight seal. It will begin to dry quickly (within 20–30 seconds), so work on one small spot at a time.

Step 4: Installing Tine Caps
If you are repairing the tips of the vertical prongs, brush the liquid vinyl onto the rusted tip, and while it is still wet, immediately slide a vinyl tine cap over it. The wet liquid vinyl acts as an industrial, waterproof glue that locks the cap permanently in place.
Step 5: The Cure Time (Crucial!)
Apply a second coat to any areas that need it after 30 minutes. Once you are finished, leave the rack out of the dishwasher for at least 24 hours. Even if it feels dry to the touch in an hour, the chemical curing process takes a full day to harden enough to withstand a 150°F wash cycle.
Common Mistakes to Avoid
-
Mistake 1: Painting over loose rust. If you don’t sand the rust away first, the oxidation process will continue underneath your new patch, and it will push the vinyl right back off in a month.
-
Mistake 2: Using Cyanoacrylate (Super Glue). Standard super glue breaks down in hot water. If you try to glue tine caps on with it, they will pop off during the wash cycle and end up melting on your machine’s heating element.
-
Mistake 3: Skipping the 24-Hour Cure. Patience is mandatory here. Running a load of dishes 4 hours after painting will wash your hard work right down the drain.
Prevention: How to Stop Rust Before It Starts
Once you’ve done this repair, you won’t want to do it again. Extend the life of your dishwasher racks with these two tech secrets:
-
Load Knives Point Down: Sharp chef’s knives and forks slicing into the vinyl coating is the #1 cause of rust. Always load cutlery with the handles pointing up.
-
Don’t Overload Heavy Pots: Forcing a massive, heavy cast-iron skillet or a glass casserole dish tightly against the tines causes the metal wire underneath to flex, which cracks the vinyl coating.
FAQ From the Comments
Can I use Plasti Dip spray to coat the whole rack? While Plasti Dip is a rubberized coating, standard hardware store Plasti Dip is not formulated to withstand the extreme heat and caustic detergents inside a dishwasher. It will eventually peel and make a massive mess of your pump. Stick to appliance-specific formulas like ReRack.
How long does this repair last? If you prepped the metal properly with sandpaper and alcohol, and let it cure for 24 hours, a liquid vinyl patch can easily last 3 to 5 years, giving you plenty of extra life out of your aging appliance.
Final Thoughts
A rusty dishwasher rack isn’t a death sentence for your appliance. For the cost of a couple of coffees, a bottle of liquid vinyl can easily buy you years of extra use and keep harmful rust flakes out of your expensive pump motor. Take your time, prep the metal properly, and enjoy your spot-free dishes!
Have you tried fixing your dishwasher rack, or are you dealing with a machine that’s starting to show its age? Leave a comment below with your model number, and let’s talk shop!